PartedMagic Instructions
1. Plug battery pack into laptop.
2. Insert PartedMagic USB stick into laptop.
3. Turn on laptop.
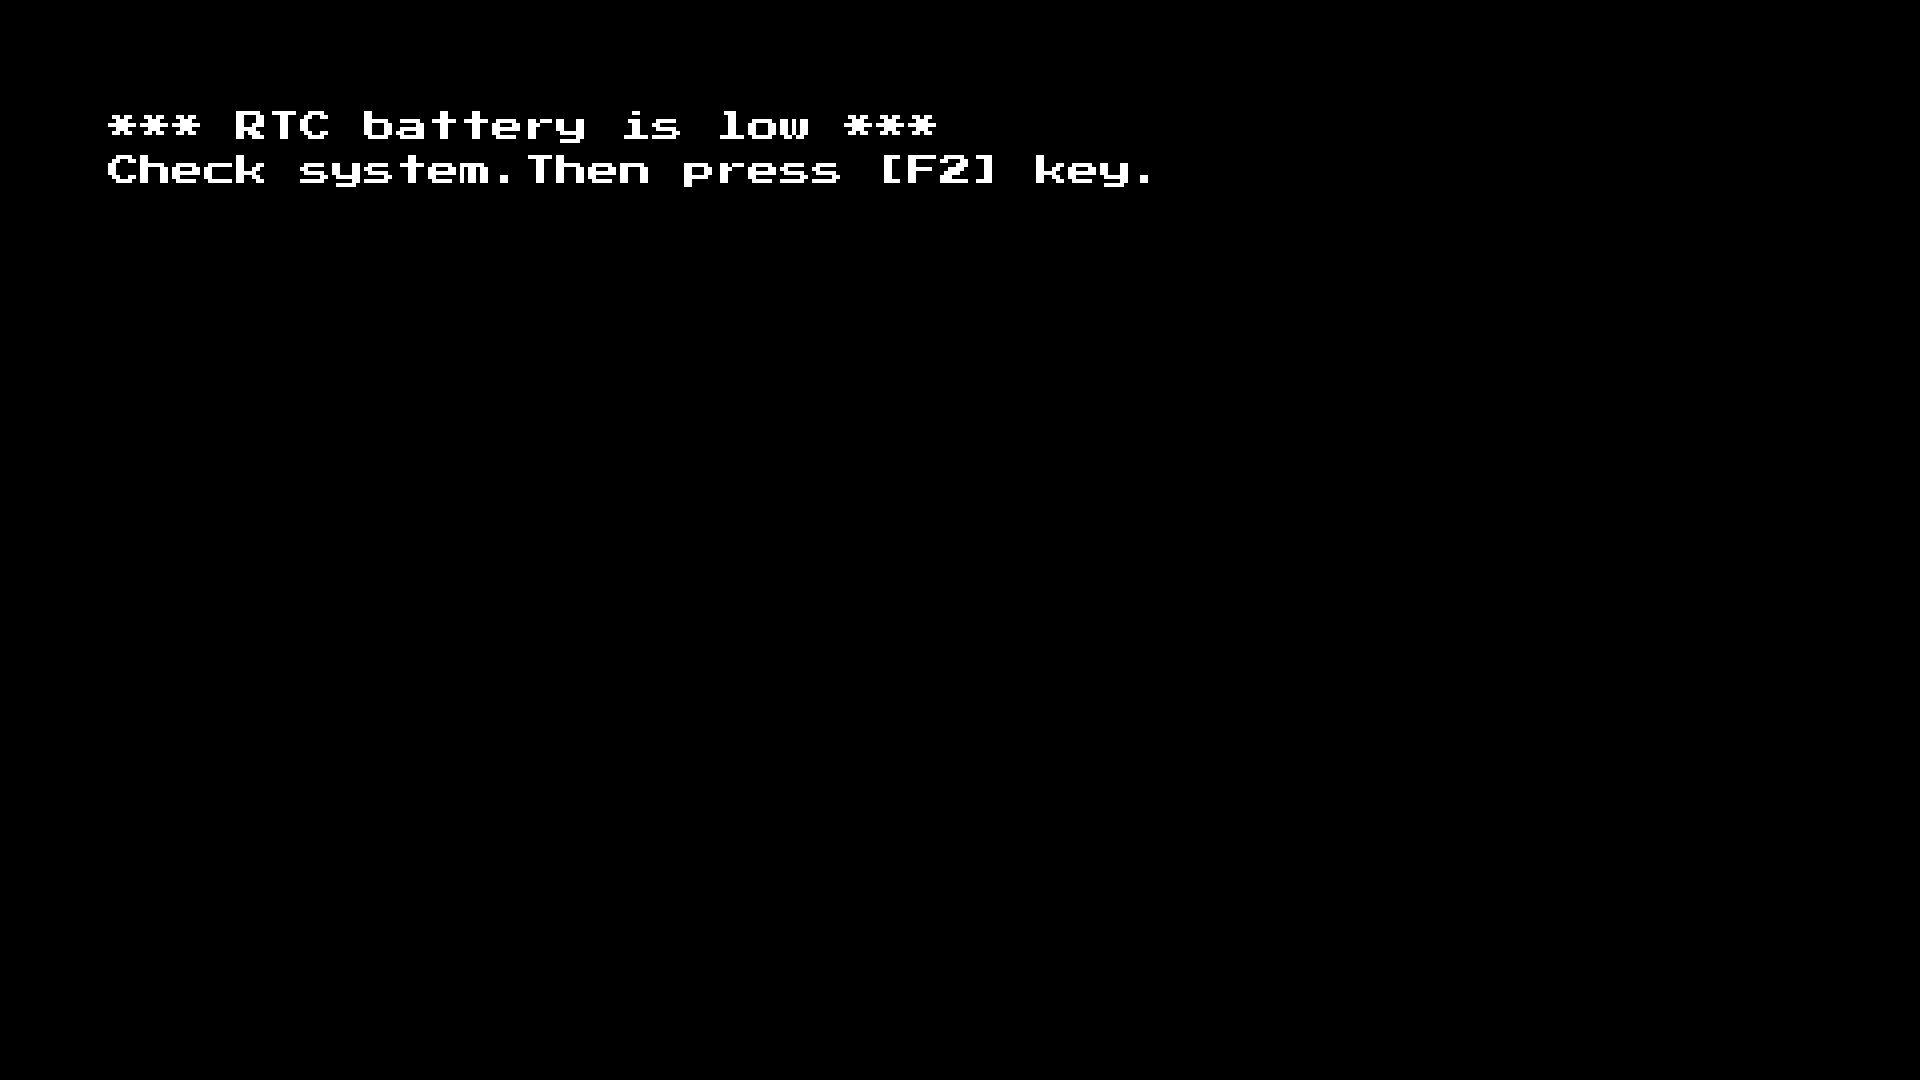
4. When this screen shows: Press
F2
If this screen doesn’t show, skip to step 8.
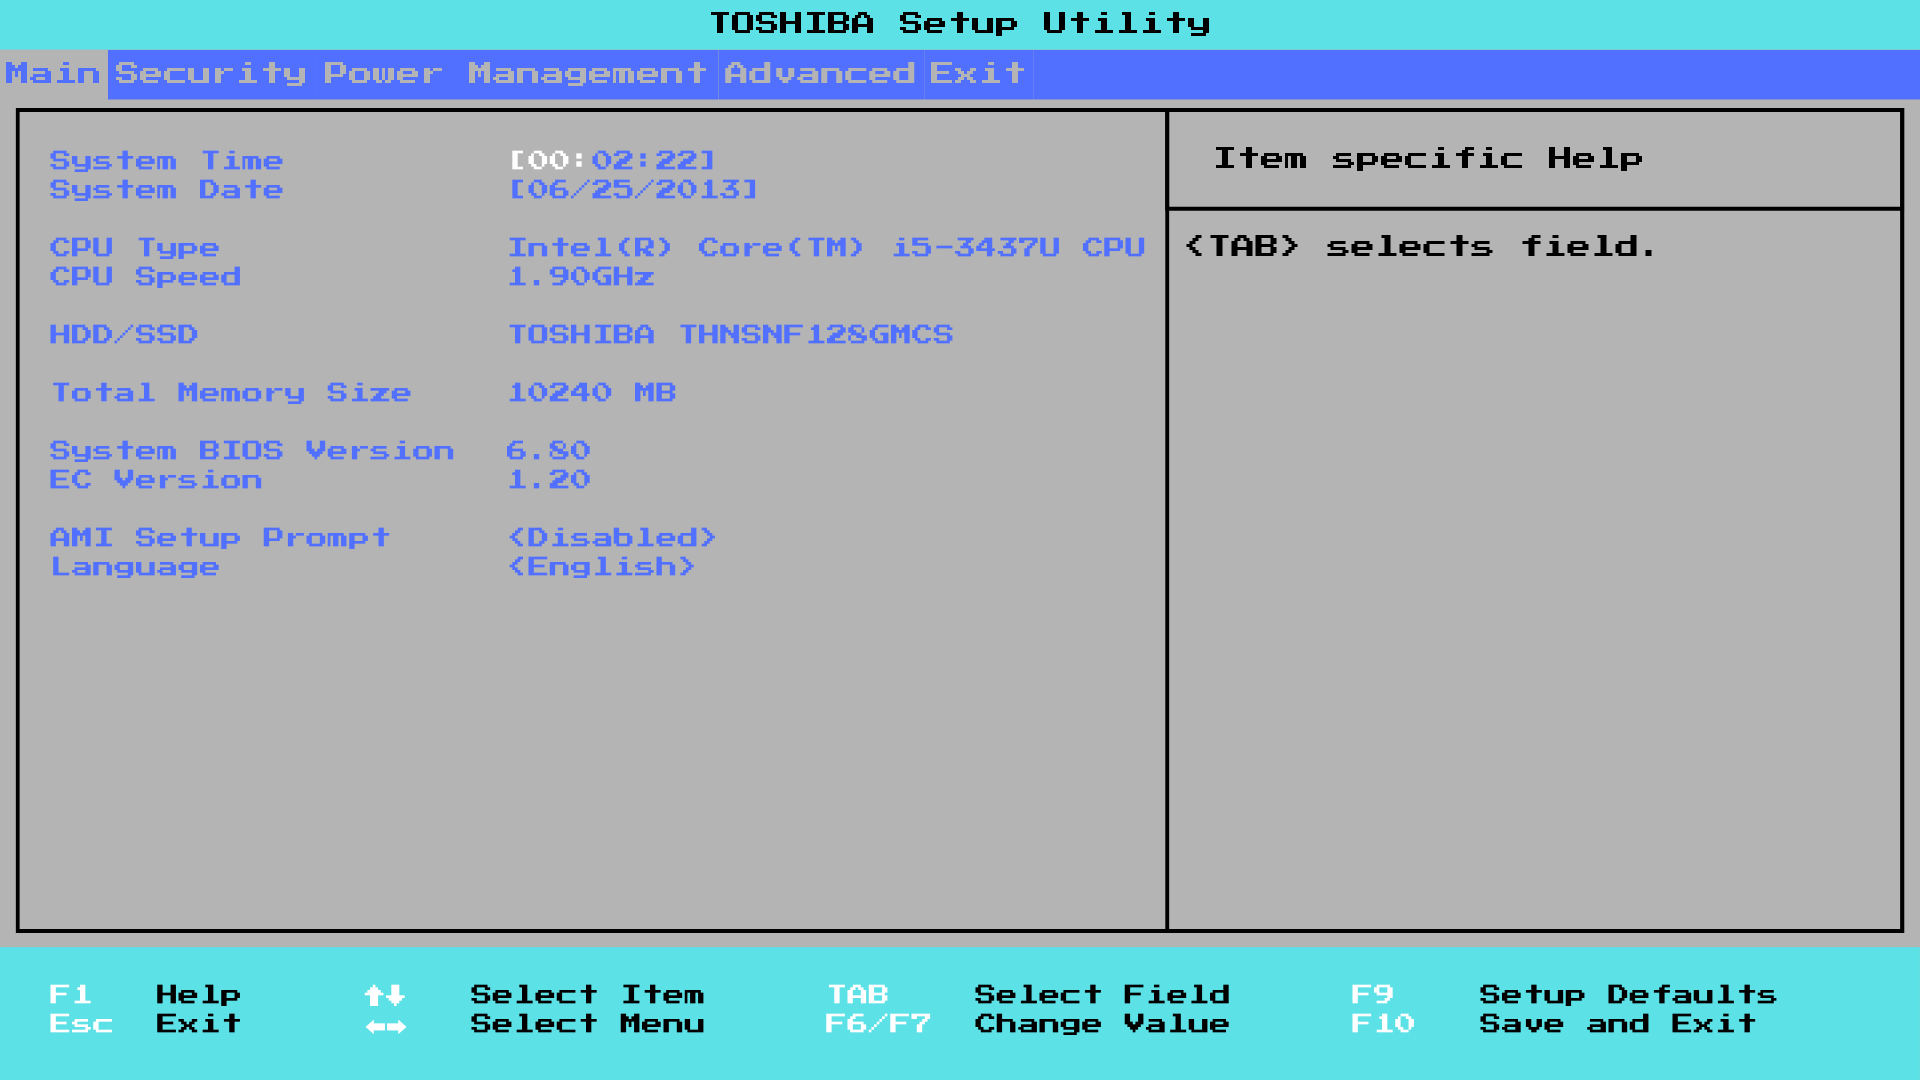
5. Change Date and Time to the current Date and Time.
6. Press F10
7. Press Y
8. Press
F12 repeatedly until the Boot Menu screen shows.
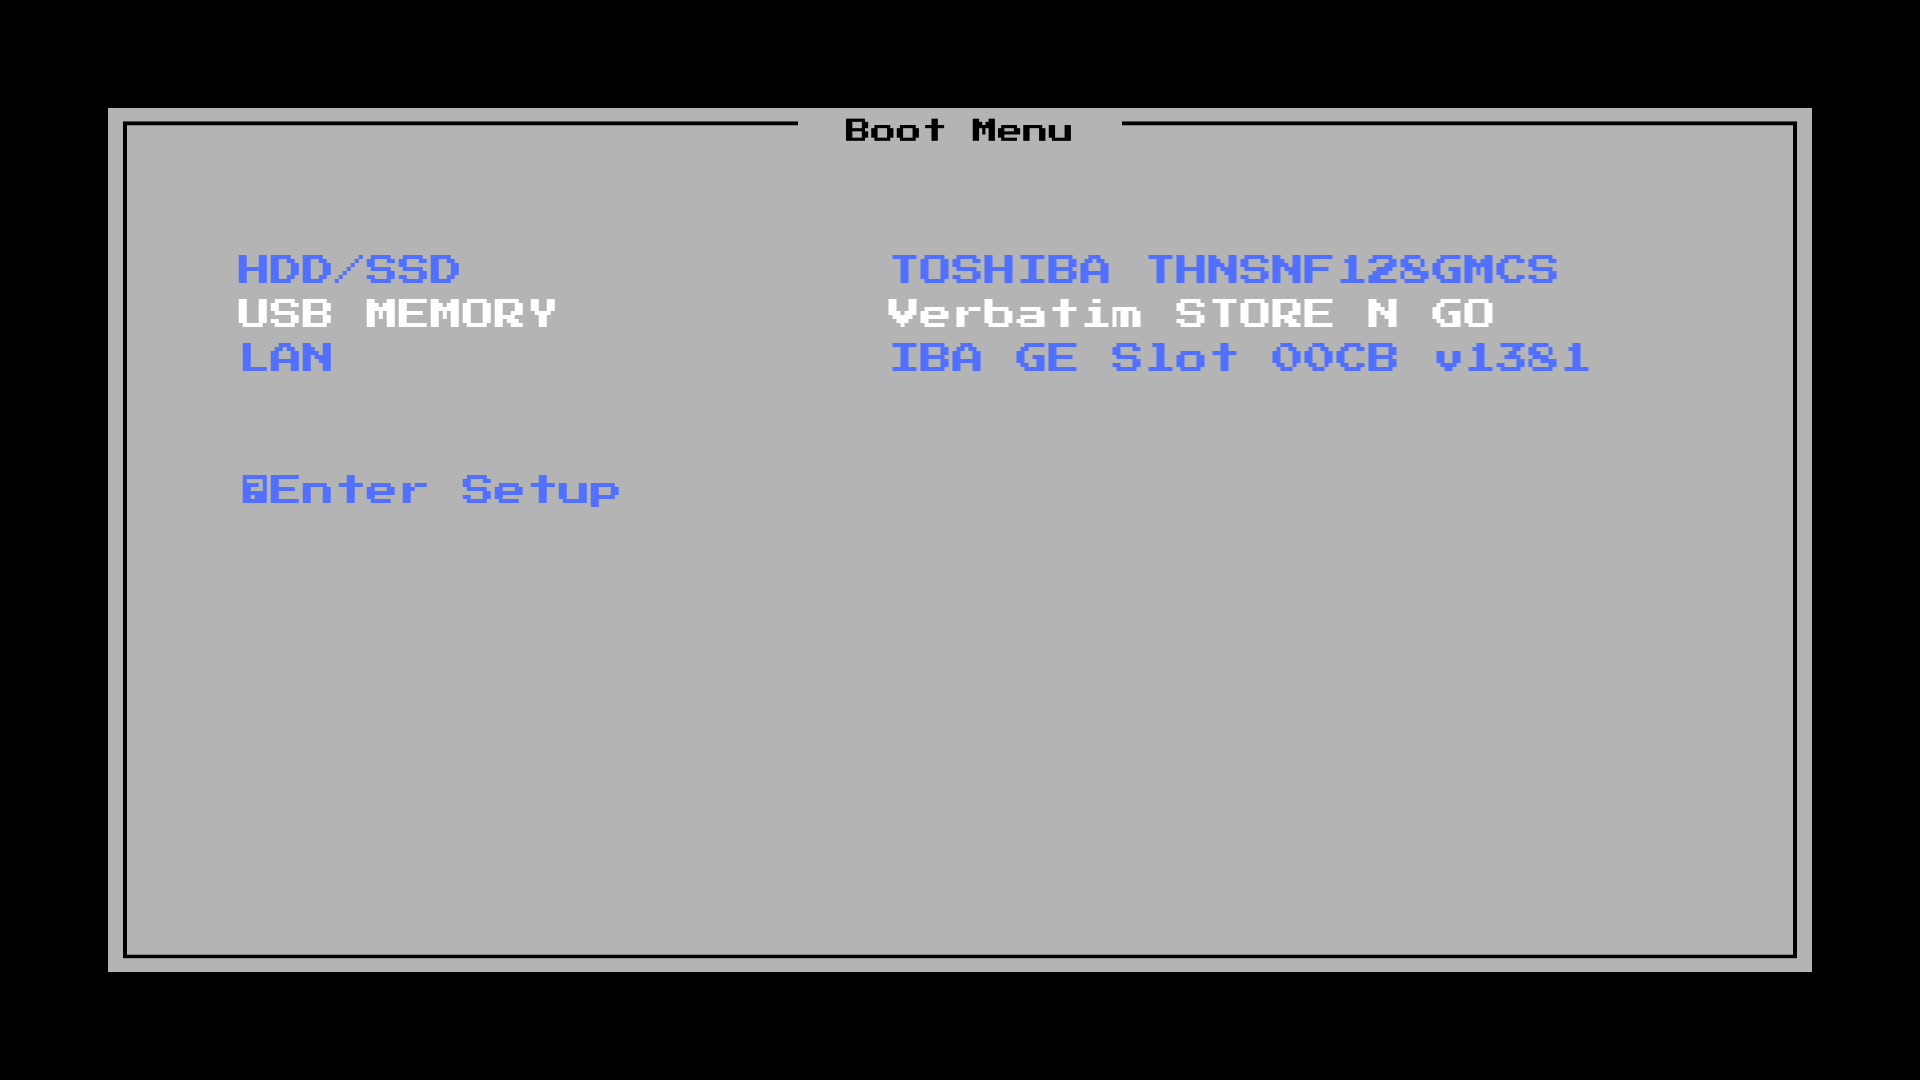
9. Select
USB MEMORY
If the next screen shows immediately, skip steps 10 and 11.
10. Press F12 repeatedly until the Boot Menu shows again.
11. Select USB MEMORY again.
12. Once at this screen, press
ENTER

13. Wait until it boots into PartedMagic.
14. Once into PartedMagic, click this icon:

15. Click Secure Erase - ATA Devices
16. Click
Sleep (only if frozen)
If not frozen, skip to step 17.
17. Wake the computer up.
18. Click the checkbox for /dev/sda
19. Click Continue
20. Click I allow…
21. Click Start Erase
22. Hold power button until screen turns black.
23. Power the computer on and make sure it boots to this screen:
